In this post, you will explore the world of silicone rubber printing and its diverse techniques. Every printing technology offers unique designs and patterns, but you must know how to choose the right printing technology as per your needs.
So, are you ready to enjoy the ultimate discovery of the silicone rubber printing universe? Let’s get started without any further ado.
What is Silicone Rubber Printing?

Industries where durability and design reliability are important usually consider options for silicone rubber printing. This process is quite valuable because it allows you to create high-quality prints on different substrates.
Silicone rubber printing is a process where printing is done on silicone rubber. This process is commonly used in product branding, where a business logo, design, and labels are printed onto silicone rubber products.
Here are the most popular techniques for printing on silicone rubber:
- Silicone Screen Printing
- Silicone Pad Printing
- Silicone Heat Transfer Printing
- Silicone 3D printing
- Silicone Laser Marking
Let’s dive into each silicone rubber printing technique and process.
Silicone Screen Printing
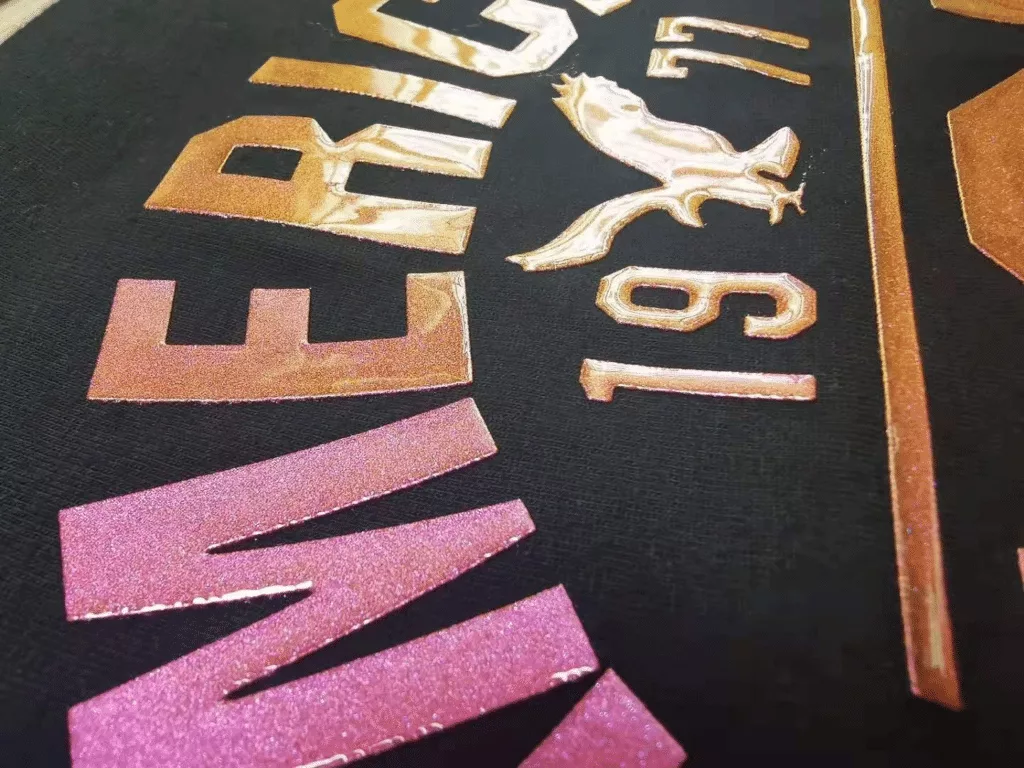
Gone are the days when oil-based ink was used to print designs. Silicone ink has revolutionized the printing industry. It is an environment-friendly, heatproof, and stretchable ink that makes the design on a T-shirt and any other place soft and smooth.

Silicone screen printing is a process where silicone ink is applied to an item using screen printing methods. During this process, experts create intricate designs and patterns on various surfaces through a stencil or mesh screen by using silicone-based ink.
Most Common Silicone Screen Printing Applications:
- Textile printing (e.g., T-shirts, sportswear).
- Labels and branding on silicone products.
- Industrial applications (e.g., gaskets, control panels).
- Medical devices and equipment labeling.
- Automotive interior components.
- Promotional items (e.g., silicone wristbands, keychains).
- Glass and ceramic decoration.
- Electronics components and membrane switches.
How Silicone Screen Printing Works?
Here is a step-by-step guide that explains the whole process:
Step 1: Design Creation
Screen printing brings with it design creation. You need a high-resolution image in vector files such as AI, EPS, Excel, and SVG.
Step 2: Choosing Screen or Stencil
The next step is to select the type of screen. A stencil is prepared by making a pattern on a fine-mesh screen. Different screen materials are available, such as stainless steel, nylon, and polyester. These days, CAD techniques are used to create stencils.
At first, manual creation was in use. The quality of printing depends on the quality of the screen. Aluminum frames are good at handling high-temperature resistance and tension, while the polyester fabric is of exceptional quality.
Step 3: Screen Preparation
Apply a photo-reactive emulsion on the screen. Set the artwork on the screen and then put it in ultraviolet light. A pressure washer is used to rinse the screen thoroughly; unexposed areas wash out and shape the screen.
The screen is dried in a controlled environment where the humidity level is below 40 percent and the temperature is within the 68-77°F range. The screen is set onto the printing press. It’s always a good idea to test the print to perfect its alignment.
Step 4: Ink Preparation
Specially formulated silicone-based inks are used for screen printing. These silicone inks primarily consist of pigments, silicon polymers, and additives. It’s vital to pay attention to the viscosity and composition of ink, as it plays a significant role in getting durable and smooth screen printing results.
Step 5: Substrate Alignment
A substrate garage is normally used for proper substrate alignment. Once the substrate is placed, say 0.5 inches from the screen edge, micro-registration knobs are adjusted.

Step 6: Squeegee Action
A squeegee is used to push the ink through the opening in the screen onto the substrate. This ink passes through an open area and creates a desirable pattern on the surface. In case your design involves multiple colors or layers, each layer or color is applied one at a time.
Step 7: Curing
Once the ink is applied, it needs time to dry. It’s how it will achieve the final properties. Heat curing is a process during which silicone ink is dried.
Step 8: Final Inspection
After the curing process, the printed substrate goes to a quality check. The inspection team checks everything to ensure the print is high quality and durable.
Inquire About Our Silicone and Plastic Products!
Silicone Pad Printing
It is a printing process where a pad transfers the design onto a substrate. The easiest way to understand this printing is to recall when you were kids and used to use stamps for your creative projects. Silicone pad printing is the same but with a touch of sophistication in technique.
The best printing technique is silicone pad printing when you want to create enticing prints on small surfaces, three-dimensional consumer products, or intricate parts. The biggest plus of the silicone pad printing process is that it allows you to print in all sizes and shapes.
Besides, you can create high-quality prints on various substrates such as glass, ceramics, metals, and plastic.
Common Applications of Silicone Pad Printing:
- Promotional product branding (e.g., pens, keychains).
- Medical device labeling (e.g., syringes, catheters).
- Industrial labeling and marking (e.g., control panels).
- Electronics components and keypads.
- Automotive parts labeling.
- Toys and games customization.
- Glassware and ceramics decoration.
- Personalized consumer goods.

How does Silicone Pad Printing Work?
Here is a step-by-step process for silicone pad printing:
- Ink Preparation: In the first step, ink is formulated to achieve the desired color, curing properties, ink consistency, and adhesion.
- Etched Printing: Steel or photopolymer is used to create a printing plate containing recessed images of the design. Ink is applied to the plated, and it fills the recessed areas.
- Pad Transfer: The silicone pad is made of silicone rubber. It is used to transfer the ink from the plate to the substrate. The flexible pad adjusts as per the shape of the object being printed. This technique is super effective in creating precise prints on curved and irregular shapes.
- Ink Pickup: The silicone pad is pressed on the inked printing plates. Ink adheres to the pad, and a thin ink film appears on the pad surface.
- Ink Transfer: This pad is placed over the substrate, and ink is transferred from the pad to the object surface.
- Curing or Drying: The curing process begins once the ink is transferred to the substrate. Heat curing is a common technique used to dry the ink on the substrate.
- Quality Check: In the final step, the design and object are checked to ensure the final results are of excellent quality.
Difference Between Silicone Screen Printing and Silicone Pad Printing
| Aspect | Silicone Screen Printing | Silicone Pad Printing |
|---|---|---|
| Printing Method | Uses a mesh screen and squeegee to transfer ink onto the substrate. | Utilizes a flexible silicone pad to transfer ink from an etched plate onto the substrate. |
| Substrate Compatibility | Suitable for flat or slightly curved surfaces. | Ideal for irregularly shaped and 3D surfaces due to the flexibility of the pad. |
| Print Detail | Capable of high-resolution and detailed prints. | Provides fine details but may have limitations in intricate designs. |
| Production Speed | Suitable for high-volume production due to the speed of screen printing. | Slower compared to screen printing, making it better suited for smaller runs. |
| Ink Types | Can use various types of silicone inks, including heat-cured and UV-cured inks. | Utilizes silicone-based inks specifically formulated for pad printing. |
| Setup and Equipment | Requires a mesh screen, frame, and squeegee for each color, which can be time-consuming to set up. | Involves pad printing machines equipped with pads and etched plates. |
Inquire About Our Silicone and Plastic Products!
Silicone Heat Transfer Printing
These printing techniques have been used since the 1950s. But these days, you can find this technique with advanced technology and a touch of sophistication.
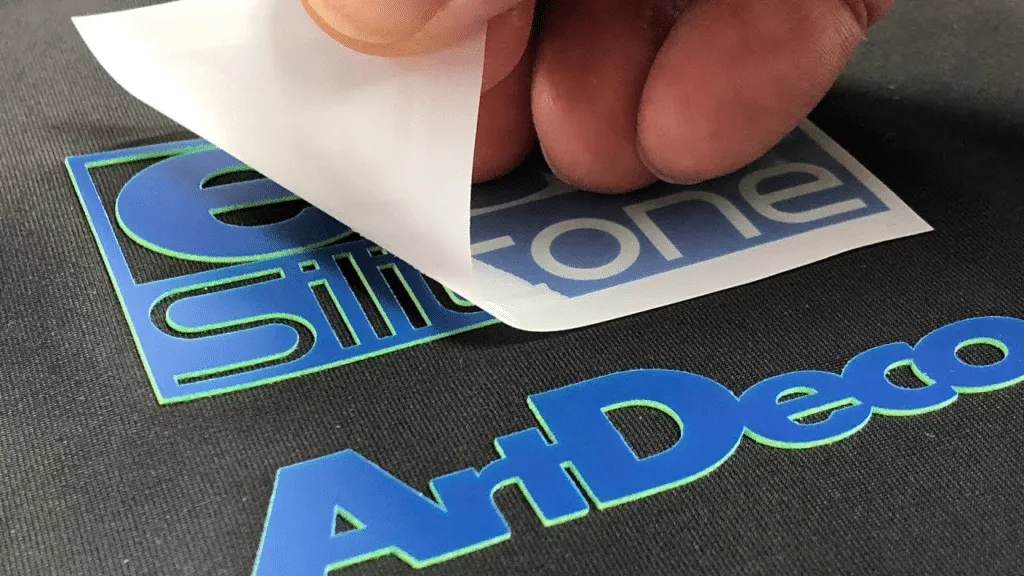
It is a method during which a silicone transfer pad is used to transfer ink onto the substrate. Heat and pressure are used to transfer ink design on the surface.
Silicone heat transfer printing is famous for improving the aesthetics of textile and apparel products such as hats, bags, t-shirts, etc. Since this technique creates durable and visually appealing designs, it’s a popular choice in the fashion and garment industry.
Silicone Heat Transfer Printing Applications:
- Customized textile printing (e.g., clothing, hats).
- Medical devices and implant marking.
- Automotive interior components customization.
- Personalized consumer goods (e.g., silicone phone cases).
- Soft robotics components.
- Promotional product customization.
- Decorative printing on silicone-coated items.
- Branding and labeling on silicone rubber products.
How Does Silicone Heat Transfer Printing Work?
Here is a complete process:
- Design Creation: In the first step, a design that needs to transfer onto the fabric is created. This design is usually made from the silicone material.
- Preparation of Silicone Heat Transfers: Silicone heat transfers are prepared in the second step. It is a process where liquid silicone rubber is injected into a mold or template and then cured to get a hardened, desirable shape. This process creates flexible silicone transfers.
- Application to Fabric: Silicone heat transfer labels are perfectly positioned on the desired location of the fabric. Heat and pressure are applied through a heat press machine so that a silicone label is adhered to the fabric. Heat-activated adhesive layer on the silicone label and let it make a strong bond with the fabric. Specific temperature and pressure are applied for a predetermined period known as dwell time. Keeping up with dwell time is vital because it allows the adhesive to bond strongly with the fabric.
- Cooling and Removal: The heat press is released once the dwell time is over, and the label cools. Once the cooling process is complete, the adhesive is fully attached to the fabric. Now, the backing paper or film is removed.
Inquire About Our Silicone and Plastic Products!
Silicone 3D Printing Method
It is a highly advanced silicone printing technique during which specialized 3D printers are used to create three-dimensional parts of objects from silicone material. This method is also known as silicone additive manufacturing.
This printing technology makes it easy for manufacturers to produce objects with specific material properties that are pretty challenging to create with traditional manufacturing methods.
How Does Silicone 3D Printing Work?
Here is a step-by-step guide to the Silicone 3D printing process

1. Material Selection
In the first step, silicone-based material is selected for printing. This material contains cross-linking agents, additives, silicone polymers, and curing agents. The formulation of the material totally depends on the application and the desirable properties you want to get in the final printed object.
2. Layer-by-Layer Printing
Once the material is selected, the next step is to build the object layer by layer. Small amounts of silicone material are deposited and cured layer by layer as per the digital design file provided to the 3D machine.
3. Printing Process
Silicone 3D printers use two common approaches to printing. Some printers employ a material extrusion process. A print head dispenses the silicone material onto a build platform in an exact pattern during this method. Silicone-based material is usually in a semi-liquid or paste-like form.
Another printing approach is light-cured silicone, which requires the use of light-curable silicone resin. This technique employs a UV light source to cure the silicone layer by layer once it’s deposited. The purpose of this visible light source is to solidify silicone material into its desired shape.

If your design involves complex objects, support structures are added during printing to maintain stability. These structures are printed alongside the object but later removed or dissolved.
4. Curing or Post-Processing
Once printing is done, the curing process begins. Sometimes, additional post-processing is required to boost an object’s mechanical properties, such as strength and flexibility. Heat curing is a typical process, but sometimes, further exposure to light is a must to get great final results.
Silicone Laser Marking or Etching
Silicone Etching is a process that employs laser technology to create permanent patterns, marks, and designs on silicone-based material. The common application of this method is labeling, identification, branding, and decorating silicone products.
Common Applications of Silicone Laser Marking:
- Permanent marking on medical devices.
- Automotive component branding.
- Electronics parts traceability.
- Aerospace part identification.
- Serial numbers and barcodes on silicone products.
- Personalized jewelry and fashion items.
- Customized silicone wristbands.
- Imprinting safety information on silicone products.
Inquire About Our Silicone and Plastic Products!
How Does Silicone Laser Marking Work?
Let’s dive into the step-by-step process of silicone laser engraving:
1. Laser Selection
In the first step, you need to pick the laser technology. This selection is based on the basic requirements of silicone material being marked or the desired marking results.
It would be best to consider different factors such as material composition, thickness, and types of marks needed before picking a laser. The most common types of lasers used for silicone laser marking are CO2 lasers and fiber lasers.
2. Laser Settings
In the next step, laser settings are performed to achieve the desired marks. You need to adjust parameters such as pulse duration, repetition rate, scanning speed, and laser powers. These parameters are adjusted as per the design and material specifications.
3. Masking
If you want to do selective marking, then the masking material of stencils is applied on the silicone surface before laser marking. Stencils only expose those areas where you need laser marks and protect the rest from the marking.
4. Laser Marking
In this step, the laser beam is directly on the silicone surface for marking. There are different marking methods, such as engraving, etching, and surface annealing.
When creating deep grooves or text on silicone, engraving is a good choice. The laser vaporizes a thin layer of silicon material during this method to leave a deep and permanent mark on the object.
The laser beam is precisely directed onto the silicone surface. The following marking methods can be used depending on the laser type and settings.
When creating a surface-level design or label, etching is a good approach. During this method, a superficial layer of silicone material is removed to make a contrasted mark.
Surface Annealing is an advanced technique designed to create aesthetically pleasing designs or high contrast marks. In this method, a laser is applied to the material to induce surface material. As a result, the material color changes while no material is removed.

5. Quality Control
Once the laser marking process is done, the quality control process begins. Experts check the object to ensure the marking is accurate and high-quality. During this process, they also check the depth, adherence, and legibility of marks.
Choose the Right Printing Technology for Your Needs
You need to consider the following factors to pick the right printing technology as per your design and object needs.
Identify Your Application
The choice of printing technology is based heavily on the application. If you want to print an irregular-shaped object, you need to opt for screen pad printing. However, when you need permanent marks and logos on your branded T-shirts, you can either pick screen printing or laser printing. So, what you want to achieve from your printing helps you pick the right kind of silicone printing technology
Material Compatibility
Another thing to take into account is the silicone-based material being printed. Different materials have different properties. Some are flexible; others are hard. Ensure your material is compatible with the printing technology you plan to use.
Print Quality and Detailed Prints

Every print has specific quality requirements. If you are looking for exceptional precision and fine details, then silicone 3D printing or laser printing is a good technique. However, when you have a large object to print, it’s always a good idea to choose screen printing. Whereas small and intricate objects get high-quality prints with a silicone pad printing process.
Durability and Resistance
Another factor to consider is the environmental condition of the printed items. Silicone heat transfer or pad printing are two great options if you need a print that resists heat or chemicals. They offer durable and highly resistant prints.
Quantity and Production Speed
How many items do you want to print? It’s always a good idea to consider the volume of print and production speed. If you have a bulk T-shirt order with branding, you can quickly handle this order with screen printing. Undoubtedly, 3D printing techniques will slow down the production process in this scenario. So, always consider production speed and volume while picking the right printing technology.
Budget and Cost Considerations

You need to consider your budget before picking a printing technique. Some printing techniques, such as screen printing and 3D printing, require heavy investment, while pad printing is cost-effective.
Besides, you also need to consider the cost of training and maintenance. Some printing machines and equipment need constant maintenance, while others are easy to maintain. Similarly, some printing technologies are easy to handle, while others require continuous training. Consider the cost aspect while choosing the right printing technology for your needs.
Inquire About Our Silicone and Plastic Products!
Conclusion
Finally, you have discovered diverse technologies of silicone rubber printing. Now, you have the key to uncover your creative potential. Every technique has a subtle application to let you grow your business with endless design possibilities. On one side, you can handle the printing of bulk bags, t-shirts, and other objects with screen printing, and on the other, you can print on intricate items with silicone pad printing.
An innovative design touch is possible with silicone 3D printing, while laser printing helps you leave long-lasting, deep-printed marks on any item you like. Silicone heat transfer is an ideal printing technique for any object that needs a durable design.
Embrace Project Innovation Today with Hongju Silicone!
Are you planning to make a lasting impression with printed design? If yes, then let’s begin the discovery of Silicone Rubber Printing techniques that unlock a world of creative possibilities! Whether you want to make money with branding or are thinking of running a business based on customization, Hongju has you covered.
Don’t wait—take the first step towards eye-catching designs, unique properties, precise labeling, and vibrant branding. Don’t know what kind of printing technology works for your business needs? Sweat not; contact us now, and our experts are ready to guide you every step of the way.