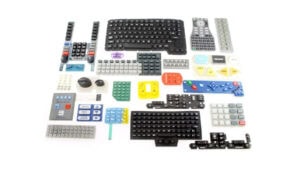
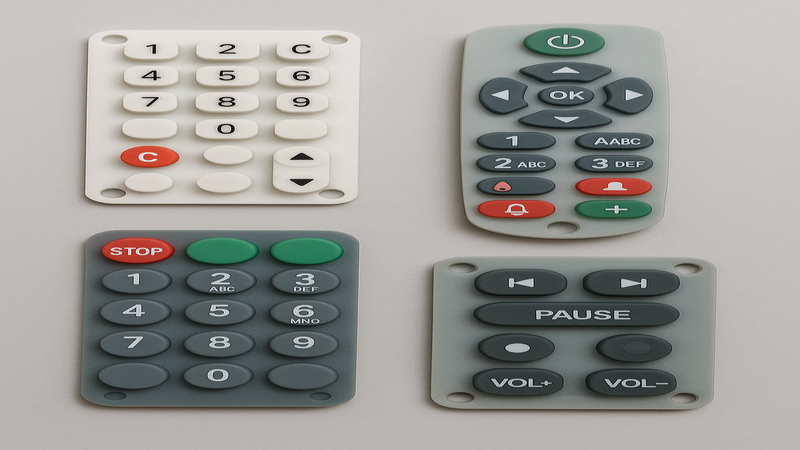
Why Make Your Own Silicone Rubber Keypad?
If you are working on a personal project or a small business idea, DIY is a practical option. The DIY approach gives you complete control. You can decide the shape, size, and overall design of every key.
Cost is another major advantage. Building one keypad yourself costs less than ordering a custom unit from a manufacturer. The DIY project will also provide an opportunity to learn valuable skills. It gives you hands-on experience with silicone casting, mold design, and setting up electrical contacts.
Materials and Tools You Need
Every project runs smoothly with the right setup. The right tools and materials needed to make a DIY custom rubber keypad:
Silicone Options
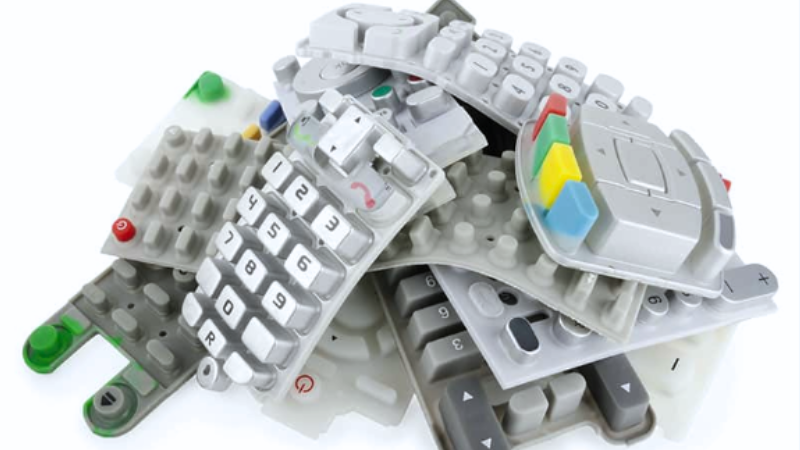
Most silicone rubber keypads are made with two types of silicone. LSR and RTV silicone. Liquid Silicone Rubber (LSR) is a strong and long-lasting. It is used in consumer electronics. Liquid Silicone Rubber (LSR) cures with heat and costs more. But delivers top quality.
RTV Silicone (Room Temperature Vulcanizing) is cheaper for DIY projects. It can be cured at room temperature and comes in two-part kits. Perfect for hobbyists and prototypes.
Mold Materials
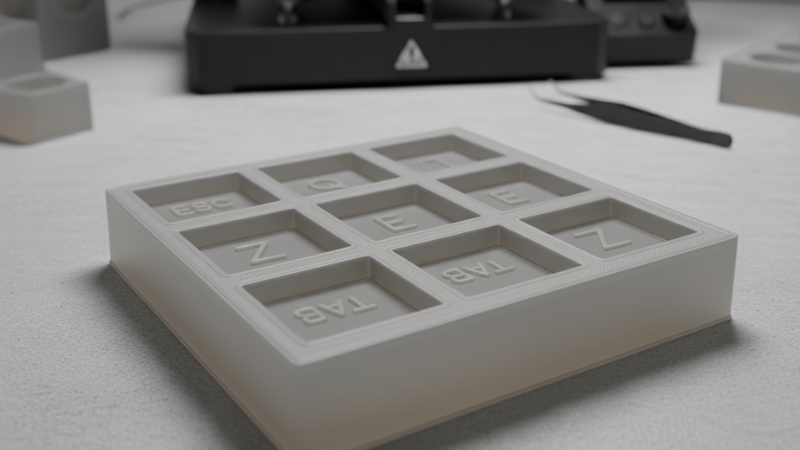
Usually molds are made with silicone, resin, or aluminium. A 3D printed silicone keypad mold is suitable for test design. It is the fastest way to prototype.
Essential Tools
- Mixing cups and stir sticks
- Scalpel or craft knife
- Gloves and safety gear
- Clamps
- Vacuum chamber (optional, but useful for removing air bubbles)
Other Helpful Materials
You will need a release agent. It helps in easy demolding of silicone keypad without sticking to the mold. Conductive carbon pills or conductive ink used to create the contact points with the circuit. When a key is pressed it complete the circuit and the specific task related to the key is performed.
An adhesive is also used. It hold the keypad layers together. It keeps conductive pads in place and provides long term durability.
How to Design a Silicone Keypad
A good silicone keypad design makes it practical. The keypad gives a good tactile feel when pressed and responds consistently. It should last through repeated use.
- Diaphragm design: The diaphragm thickness, angle, and height determine the force needed to press the key and how quickly it bounces back. A thin diaphragm makes button pressing easy. A tall one adds strength and durability.
- Button spacing: If the buttons sit too close together, users can press the wrong one. Leave at least 0.040 inches between keys for accuracy.
- Thickness: A keypad that is 3-5 mm thick gives reliable tactile feedback.
- Snap ratio: Keep the snap ratio above 0.5 for good tactile feedback.
- Markings and labels: Use screen printing or laser etching for button symbols. For backlit designs, translucent silicone or side-mounted LEDs work well.
How to Make a Silicone Keypad Mold
The mold defines the keypad shape and precision. Traditionally, the keypads manufacturing process is done with compression molding. Molds are usually made with resin and aluminium. They are strong and long-lasting. But they cost more and take time to produce.
Sometimes silicone molds are better for chemical resistance, versatility, and flexibility. For DIY use, a 3D printed mold for quicker prototypes. It is a cost-effective option and can be easily customized. It is suitable for testing new keypad layouts.
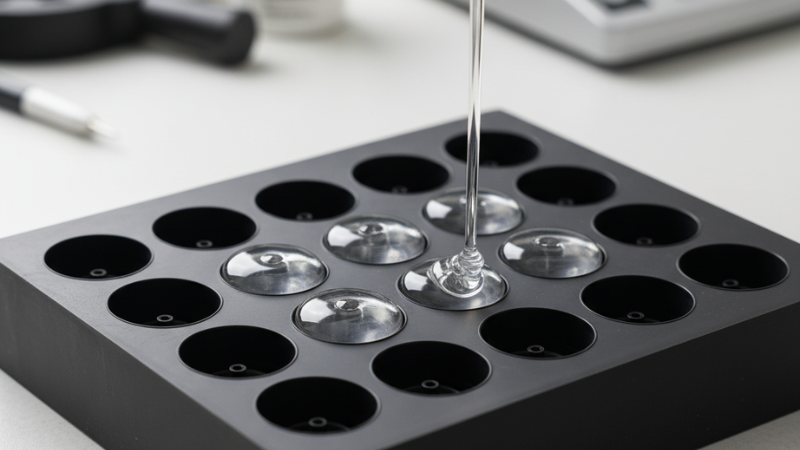
Tips for Precision and Avoiding Air Bubbles
- Always apply a mold release spray before pouring silicone.
- Pour silicone slowly. Start from the lower point to avoid air bubbles.
- Use a heat gun or vibrate to let the air bubbles rise and pop.
- After pouring place the mold on a flat surface to avoid warping and for precision.
Step-by-Step DIY Silicone Keypad Casting Process
Silicone rubber keypads are easy to make when you get the right tools and materials. Follow these steps carefully for the best results.
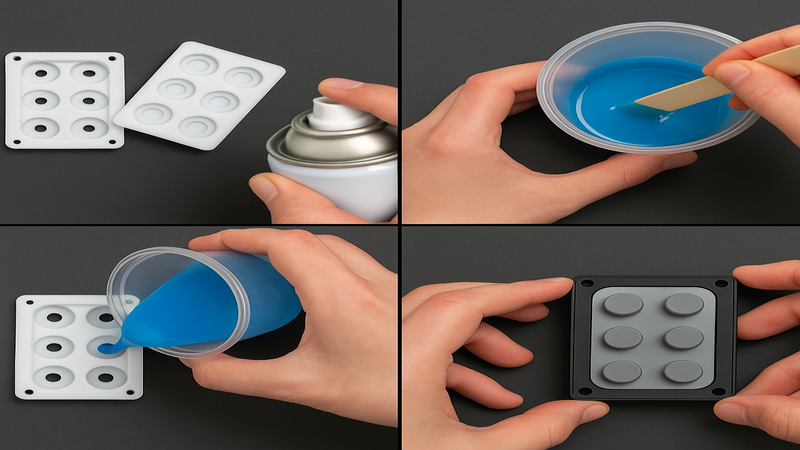
Step 1: Prepare the Mold
Begin with your mold. If you are prototyping a 3D printer is the quickest way to create it. Print both the top and bottom halves with materials like ABS(Acrylonitrile butadiene styrene)or PLA. Clean the prints thoroughly to remove dust or residue that can affect the surface of your keypad.
Spray a thin and even layer of mold release inside both halves before pouring the silicone. This coating acts like non-stick cooking spray. You can remove the cured keypad smoothly without tearing.
Step 2: Measure the Silicone Rubber
For the keypad, use a two-part silicone rubber such as RTV or Oomoo. Scoop equal amounts of Part A and Part B into a disposable mixing cup. The right ratio of silicone is critical. If the mix is off, the silicone remains sticky or cures unevenly. Always measure carefully for consistent hardness and durability.
Step 3: Mix the Silicone Rubber
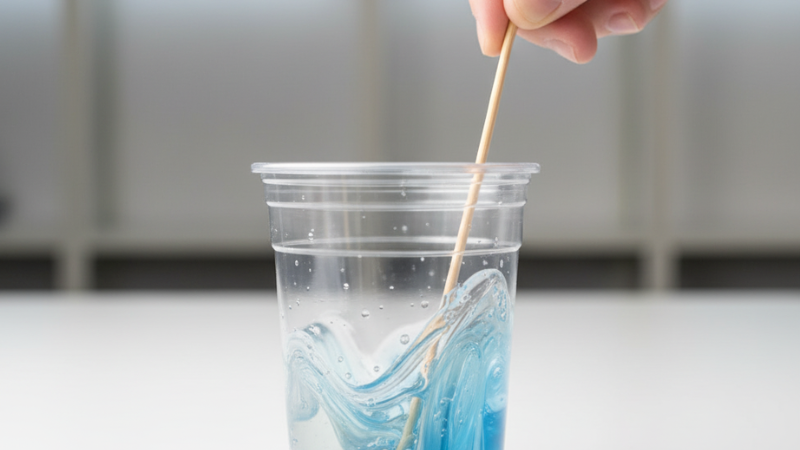
Stir the two parts together until the mixture has a uniform color with no streaks. Mix slowly to reduce the chance of the formation of air bubbles. In different types of silicone, the DIY grade does not set immediately. So mix it for a few minutes.
Step 4: Pour the Silicone
Place the bottom half of the mold on a flat surface. Carefully fill cavities with the silicone mixture. Now align and place the top half of the mold over it. Some silicone can squeeze out of the edges. This is completely normal. Just make sure both halves stay aligned so the buttons curve with the correct shape.
Step 5: Clamp and Cure
Hold the mold with a clamp or a small vice. Do not over-tighten. This can warp the mold and distort your keypad. If you notice small gaps at the top, you can add extra silicone to fill them. Leave the mold to cure for the recommended time on the product label. Most silicone rubbers take 6 to 24 hours to harden completely.
Step 6: Demold the Keypad
Remove the clamp when the silicone is fully cured. Gently separate the two mold halves. Peel the keypad carefully from the mold and take it out. Trim any thin extra layers around the edges with a sharp blade or scalpel for a clean finish.
Step 7: Assemble With a Frame
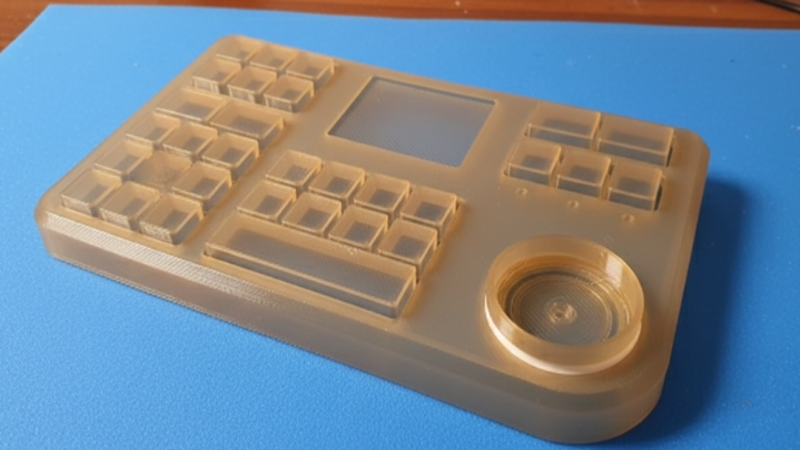
The keypad works properly if flexed only at the buttons. A frame keeps the rest of the silicone sheet rigid. It does not let it bend. Print a simple top and bottom frame on your 3D printer. Place the silicone rubber keypad inside the frame so the buttons can move freely.
Step 8: Add Conductive Contacts

A conductive material acts as a switch when integrated into silicone keypads. Flip the keypad over and apply it to the underside of each button. You can use tiny pads of conductive rubber or a thin layer of conductive ink.
These contacts let the button complete a circuit when pressed against the PCB (Printed Circuit Board).
Step 9: Hook It Up
At last, position the keypad over a circuit board designed with interlaced “finger” contact patterns. When you press a button, the conductive material bridges the gap between the contacts and completes the circuit. This sends a signal to a microcontroller such as an Arduino or Raspberry Pi, which interprets the button press and performs the programmed action.
Common DIY Silicone Keypad Mistakes to Avoid
A silicone rubber keypad design needs precision. A small mistake can cause poor performance. The keypad can wear out quickly. Here are the most common issues and how to avoid them:
1. Design & Layout Mistakes
A keypad needs the right balance of buttons. Too few buttons make the device limited. With too many buttons users feel overwhelmed. Clear labels are just as important. If icons do not explain their purpose, people will hesitate or press the wrong key.
Sufficient spacing also plays a big role. Buttons placed too close together can cause accidental presses. Always leave enough distance for easy operation.
2. Structural and Mechanical Flaws
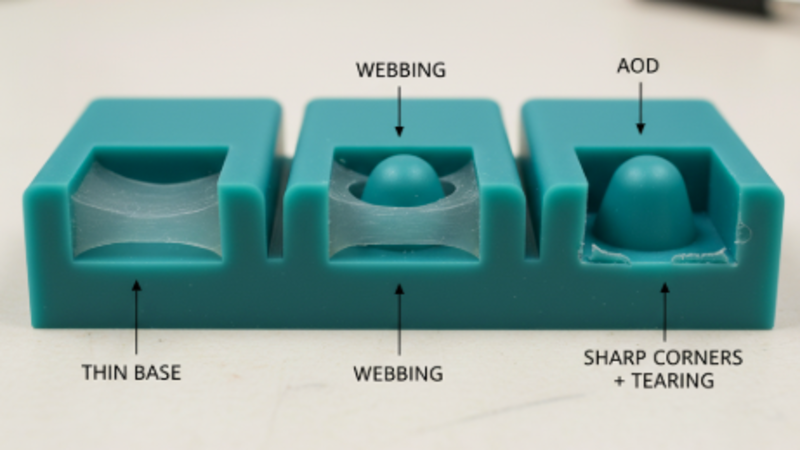
A strong base is essential. If the foundation is too thin, the keypad feels unstable and wears out quickly. The webbing is a thin silicone layer that lets the button flex. It also needs proper thickness. If it is too thin, the return force weakens over time. It makes the keys soft and unresponsive.
Avoid sharp 90° corners in your design. They add stress points and increase the risk of tearing. Likewise, unnecessary openings make molding harder and shorten the keypad’s lifespan.
3. Material and Environmental Mistakes
Not all silicone types perform well in every environment. Standard silicone can break down when exposed to oils, solvents, or harsh chemicals. If your keypad will face these conditions, choose a grade designed for durability.
Silicone used in electronics must be protected from static electricity. Ignoring anti-static silicone can put sensitive components at risk of electrostatic discharge (ESD) damage.
4. Contact and Force Oversights
The “feel” of a button comes with the right combination of hardness, shape, wall thickness, and contact design. If any of these are off, the key feels too stiff or too soft.

You also need to balance the actuation force (how much pressure it takes to press) and the return force (how quickly the key springs back). The buttons lose their tactile feel without the right snap ratio. They became unreliable and less satisfying to use.
How to Test and Use Your DIY Silicone Keypad
After curing and assembly, test the key factors in the silicone keypad before final installation.
Electrical Conductivity Test: Use a multimeter to check that each button closes the circuit correctly.
Tactile Response Test: Press each button multiple times to check consistent feedback.
Assembly Test: Place the keypad into your electronics project (e.g., Arduino, remote, or prototype device). It helps you verify its functionality.
DIY vs. Professional Silicone Keypad Manufacturing

The DIY method is suitable for personal electronics, hobby projects, and early prototypes. It is affordable, flexible, and a great way to learn without advanced skills. You can test ideas and build small batches at your own pace.
But DIY is not the right choice for mass production. It can not be used where durability, precision, and consistency are essential.
| Aspect | DIY Silicone Keypad | Professional Manufacturing |
| Cost | Low for prototypes | Higher setup cost, but cheaper per unit at scale |
| Precision | Adequate for hobby use | Industrial grade tolerance |
| Durability | Limited Lifespan | Long-lasting materials and coatings |
| Customization | Full creative control | Advanced options (logos, backlighting, laser etching) |
| Best For | Hobbyists, prototypes, small projects | Commercial products, mass production |
Moreover, advanced features such as multi-color printing, laser etching, or integrating backlighting are done with professional silicone rubber keypad manufacturing. If you need professional-grade quality or plan to scale, then outsource to a reliable manufacturer such as Hongju Silicone.
Conclusion
DIY silicone rubber keypads provide the opportunity for creativity and learning. You can design something unique. Now you have learned how the right silicone, a well-made mold, and careful curing can build keypads for remotes, gadgets, or even product prototypes.
However, if you need commercial-grade solutions. Partner with professionals to get superior quality and scalability.
Turn DIY Ideas into Pro Keypads With Hongju
At Hongju Silicone, we specialize in custom silicone keypads from prototypes to large-scale production. We use advanced molding technology and professional-grade materials. We turn your creativity into reality. Every design can be customized, such as adding logos, backlighting, and multi-color designs.
Contact Hongju Silicone today! Bring your custom silicone keypad project into reality!
FAQs
Q1: What type of silicone is best for DIY keypads?
RTV silicone is best for DIY because it can be cured at room temperature and is easy to handle. LSR is more durable but cures with heat and needs industrial tools.
Q2: What’s the difference between DIY keypads and factory-molded silicone keypads?
DIY keypads are great for prototypes and learning, but not durable. Factory-molded keypads are made with precision. They offer a longer lifespan and professional quality.
Q3: Can silicone keypads be customized with logos, colors, or backlighting?
Yes. Professional suppliers add multi-color printing, laser-etched legends, and even integrate LED for backlighting.
Q4: Can I order custom silicone keypads instead of making them myself?
Yes. If you need a professional-grade keypad, suppliers like Hongju Silicone specialize in custom keypad manufacturing. They offer silicone keypads with precise conductivity and durability.